Monochrome Halftone
Create classic halftone patterns with modern creative controls. Transform your footage into striking dot patterns, lines, squares, or crosshatch styles with full control over scale, rotation, color, and advanced features like radial swirl, contour-based modulation, and noise displacement.
Overview
Monochrome Halftone brings professional print and graphic novel aesthetics to your footage:
- 4 Pattern Types - Dots, Lines, Squares, and Crosshatch
- Wave Animation - Animated sine wave modulation for lines
- Dual-Color Output - Full control over bright and dark colors
- Radial Effects - Swirl and scale patterns from customizable center points
- Contour Detection - Modulate pattern scale and displacement based on image content.
- Noise Displacement - Add organic, animated distortion to patterns to add interest.
- Input Level Controls - Fine-tune gamma, lift, gain, and black/white points to control the dot sizes across your image's tonal range.
Quick Start
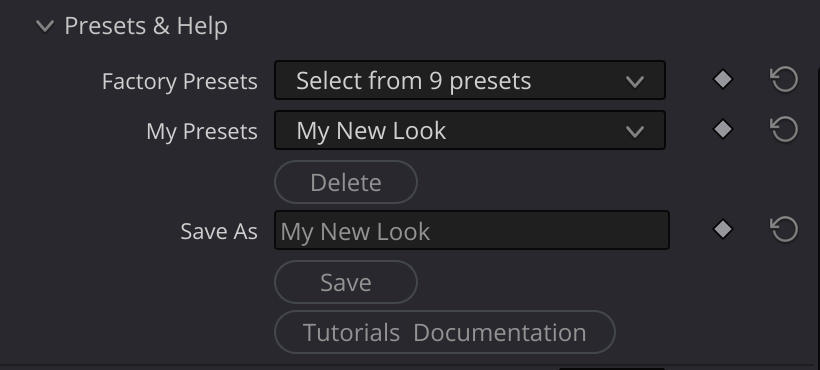
Easiest: Use the Presets!
Select the effect from the ofx list, and drag it onto a corrector node (color page) or onto a clip (editor page).
In the presets group, there are two dropdowns: "Factory Presets" and "My Presets". Try out the various factory presets to get the idea of the range of effects you can get with the Advanced Lens Blur OFX.
Later, when you develop your own looks, you can save your own presets; Give your look a name in the "save as" field, and click "save". Then, your own presets will be available in the "My Presets" drop down.
Here's the manual quickstart:
- Apply the effect to your clip
- Choose a Pattern Type - Dots (default), Lines, Squares, or Crosshatch
- Adjust Scale to control dot/line size (smaller values = larger patterns)
- Set Angle to rotate the pattern
- Choose Colors with Bright Color and Dark Color pickers
- Explore the settings for creative effects. Try the radial swirl, and the noise displacement for some easy effects.
Inputs
| Input | Required | Description |
|---|---|---|
| Source | Yes | The image to apply the halftone effect to |
Parameters
Halftone Settings
Core controls for the halftone pattern.
| Parameter | Type | Default | Range | Description |
|---|---|---|---|---|
| Pattern | choice | Dots | - | Shape of the halftone pattern (Dots, Squares, Lines) |
| Scale | float | 30.0 | 1.0 - 50.0 | Size of the pattern (smaller = larger dots/lines) |
| Angle | float | 0.0 | -180.0 to 180.0 | Rotation angle of the pattern in degrees |
| Rotation Speed | float | 0.0 | -50.0 to 50.0 | Continuous rotation animation (degrees per second) |
| Bright Color | color | white | - | Color for bright areas of the pattern |
| Dark Color | color | black | - | Color for dark areas |
| Edge Softness | float | 10.0 | 0.5 - 50.0 | Controls anti-aliasing of pattern edges |
| Tone Strength | float | 0.08 | 0.01 - 1.0 | Continuous tone amount - another form of antialiasing, perhaps more effective than edge softness. (lower = harder threshold) |
Pattern Types
- Dots - Classic circular halftone dots
- Squares - Sharp-edged square pattern, pixel-art aesthetic
- Lines - Parallel lines with optional wave modulation (see Lines/Crosshatch section)
Scale
The scale parameter works inversely - smaller values create larger pattern elements. think of it as frequency:
- 0.5-15: Very large dots/lines, bold graphic look
- 15-30: Medium dots, classic newspaper halftone
- 30-50: Fine dots, subtle halftone texture
- 50+: Very fine pattern, approaches continuous tone
Lines/Crosshatch Parameters
Additional controls for the Lines pattern type; Controls the wavyness of the lines.
There are two sections - the "line" section - which controls the primary lines, when "lines" is selected as the pattern. The "cross" section, which mirrors the line section - but is applied to a second set of lines, to generate a cross hatch effect.
| Parameter | Type | Default | Range | Description |
|---|---|---|---|---|
| Wave Amp Line | float | 0.0 | 0.0 - 60.0 | Wave amplitude for primary lines (0 = straight) |
| Wave Freq Line | float | 1.0 | 0.5 - 5.0 | Wave frequency for primary lines |
| Phase Speed Line | float | 0.0 | -90.0 to 90.0 | Phase animation speed (degrees per second) |
| Enable Crosshatch | bool | false | - | Add second set of lines for crosshatch pattern |
| Scale Cross | float | 1.0 | 0.5 - 2.0 | Scale multiplier for crosshatch lines |
| Angle Cross | float | 90.0 | 30.0 - 150.0 | Angle between line sets (90 = perpendicular) |
| Rot Speed Cross | float | 0.0 | -50.0 to 50.0 | Rotation speed for crosshatch lines |
| Wave Amp Cross | float | 0.0 | 0.0 - 60.0 | Wave amplitude for crosshatch lines |
| Wave Freq Cross | float | 1.0 | 0.5 - 5.0 | Wave frequency for crosshatch lines |
| Phase Speed Cross | float | 0.0 | -90.0 to 90.0 | Phase animation speed for crosshatch lines |
Input Levels
Fine-tune the input image before halftone processing.
| Parameter | Type | Default | Range | Description |
|---|---|---|---|---|
| Gamma | float | 1.0 | 0.5 - 4.0 | Midtone adjustment (higher = brighter midtones) |
| Lift | float | 0.0 | -0.2 to 0.2 | Value added to output (raises shadows) |
| Gain | float | 1.0 | 0.5 - 2.0 | Multiplier for output brightness |
| White Point | float | 1.0 | 0.5 - 1.0 | Input values at/above this map to white |
| Black Point | float | 0.0 | 0.0 - 0.5 | Input values at/below this map to black |
Use these controls to optimize your source image for halftone conversion. There are no real rules here - play with these controls to make your shot look it's best.
Radial Swirl
Twist the halftone pattern around a center point, creating spiral effects.
| Parameter | Type | Default | Range | Description |
|---|---|---|---|---|
| Swirl Amount | float | 0.0 | -360.0 to 360.0 | Angular twist added as distance from center increases |
| Swirl Center | vec2 | 0.0, 0.0 | - | Center point for swirl (visible as cyan crosshair) |
| Swirl Falloff | float | 1.0 | 0.1 - 4.0 | Exponent controlling how swirl builds with distance |
Using Radial Swirl
- Positive values: Clockwise twist
- Negative values: Counter-clockwise twist
- Falloff < 1.0: Most twist happens near center
- Falloff > 1.0: Most twist happens toward edges
- Falloff = 1.0: Linear increase with distance
Radial Scale
Scale the halftone pattern based on distance from a center point.
| Parameter | Type | Default | Range | Description |
|---|---|---|---|---|
| Radial Scale | float | 0.0 | -200.0 to 200.0 | Scale added as distance from center increases |
| Radial Center | vec2 | 0.0, 0.0 | - | Center point for scale (visible as orange crosshair) |
| Radial Falloff | float | 1.0 | 0.1 - 4.0 | Exponent controlling how scale builds with distance |
Using Radial Scale
- Positive values: Smaller dots/lines toward edges (vignette effect)
- Negative values: Larger dots/lines toward edges
- Combine with Swirl for complex radial patterns
- Different center points for Swirl and Scale create asymmetric effects
Noise Displacement
Add procedural noise to displace the halftone pattern for organic, hand-drawn looks.
| Parameter | Type | Default | Range | Description |
|---|---|---|---|---|
| Enable | bool | false | - | Enable noise displacement |
| Amount | float | 0.25 | -2.0 to 2.0 | Strength of displacement |
| Scale | float | 25.0 | 1.0 - 60.0 | Size of noise features (larger = bigger patterns) |
| Animate | bool | true | - | Enable time-based animation |
| Speed | float | 0.5 | -2.0 to 2.0 | Animation speed (evolution rate) |
Advanced Contouring
Modulate the halftone pattern based on image edges and luminance. This creates effects where dots change size or position based on the underlying image structure.
| Parameter | Type | Default | Range | Description |
|---|---|---|---|---|
| Enable | bool | false | - | Enable contour-based effects |
| Softness | float | 20.0 | 0.0 - 100.0 | Blur amount for contour detection |
| Scale Offset | float | 0.0 | -10.0 to 60.0 | Scale added in dark contour areas |
| Scale Uses Edges | bool | false | - | When true, scale responds to edges instead of luminance |
| Displacement | float | 0.0 | -20.0 to 20.0 | Displacement strength along contour direction |
| Displacement Angle | float | 0.0 | -1.0 to 1.0 | 0 = across edges, ±1 = along edges |
Contour Scale Mode
- Scale Uses Edges = false: Dark areas of the image get larger dots
- Scale Uses Edges = true: Edge areas get larger dots
Contour Displacement
Shifts the halftone pattern based on the image:
- Displacement Angle = 0: Pattern shifts perpendicular to edges
- Displacement Angle = 1 or -1: Pattern shifts along edges
- Combine with Scale for complex contour-following effects
Presets
The effect includes 18 presets demonstrating various looks:
Basic Patterns
| Preset | Description |
|---|---|
| 01 Basic Dots | Clean, classic halftone dots |
| 02 Dots with Swirl | Spiral dot pattern |
| 03 Dots with Swirl and Animated Noise | Organic animated spiral |
| 04 Basic Lines | Clean parallel lines |
| 05 Swirled Lines | Spiral-ish line pattern |
Wavy Lines & Guilloche
| Preset | Description |
|---|---|
| 06 Undulating Swirled Lines | Lines with twist, and noise animation |
| 07 Wavy Undulating Swirled Lines | Lines with twist, and noise animation and waves. |
| 08 Guilloche (Money) | Currency-style security pattern |
| 09 Animated Guilloche (Money) | Animated currency pattern |
| 10-12 Money variants | Different guilloche styles |
Contoured Effects
| Preset | Description |
|---|---|
| 13-17 Contoured Dots | Various contour-based dot modulations |
| 18 Freaky Face | Extreme contour effect |
Tips & Tricks
Classic Comic Book Look
- Use Dots pattern
- Set Scale to 15-25
- Use pure black and white colors
- Set Tone Strength to control contrast vs aliasing.
- Adjust Lift Gain and Gamma to control midtone density
Retro Print Effect
- Enable Noise Displacement with Amount at 0.2-0.4
- Set Edge Softness low (2-5) for rougher edges
- Use slightly off-white and dark brown/blue instead of pure black/white
- Apply subtle Radial Scale to vignette the pattern
Currency/Certificate Guilloche
- Use Lines pattern
- Enable Crosshatch with Angle Cross at 60-90 degrees
- Set Wave Amp Line to 15-30
- Set Wave Freq Line to 2-4
- Enable Swirl Amount at 180-360 degrees
- Try preset "08 Guilloche (Money)" as starting point
Edge-Responsive Halftone
- Enable Advanced Contouring
- Set Scale Offset to 10-30 (larger dots on dark/edges)
- Enable Scale Uses Edges for edge-only response
- Adjust Softness to control edge detection scale
- Optionally add Displacement for pattern flow
Troubleshooting
Pattern not visible
- Check that Scale isn't too high (pattern too fine to see)
- Verify Bright Color and Dark Color are different
- Increase Gain if source image is too dark
Pattern looks muddy or gray
- Decrease Tone Strength for harder dots
- Adjust Input Levels (Gamma, Black/White Points)
- Check Edge Softness isn't too high
Banding or artifacts
- Increase Edge Softness for better anti-aliasing
Swirl/Scale center not responding
- The overlay controls show center positions
- Ensure you're adjusting the correct center (Swirl = cyan, Scale = orange)
- Check that Swirl Amount or Radial Scale isn't zero
- remember to enable Open FX Overlays in the dropdown on the lower left of the viewer.
Contours not affecting pattern
- Ensure Enable is checked in Advanced Contouring group
- Increase Scale Offset or Displacement values
- Adjust Softness - too high may over-blur features
Animation not working
- Check that Rotation Speed, Phase Speed, or Noise Speed aren't zero
- Ensure timeline is playing (effect responds to frame time)
- Noise Animate must be enabled for noise animation