AVFX Dream Sequence
A modern interpretation of the classic "dream sequence ripple dissolve" but in an easy to use transition plugin for resolve's timeline. A Dreamy transition effect that combines animated ripple distortion, smooth blur, and a dissolve crossfade. Perfect for flashback sequences, dream transitions, memory reveals, and stylized scene changes.
Overview
Dream Sequence creates an ethereal, flowing transition between two clips:
- Animated Ripple Refraction - Organic ripple distortion that flows and evolves
- Gaussian Blur - Smooth blur that peaks at the transition midpoint. Fully customizable.
- Delayed Dissolve - Crossfade with configurable timing
The effect creates smooth, organic ripple patterns that animate in real-time. Each transition has a unique, flowing quality, and is highly customizable.
Quick Start
This is a transition effect - you'll find it in DaVinci Resolve's Transitions panel under "Academy VFX Transitions". Drag it between two adjacent clips. The outgoing and incoming clips need to have some "handles" in order for the transition to have the material to work on, just like a regular dissolve, or other transition effects.
The easiest way - use the presets!
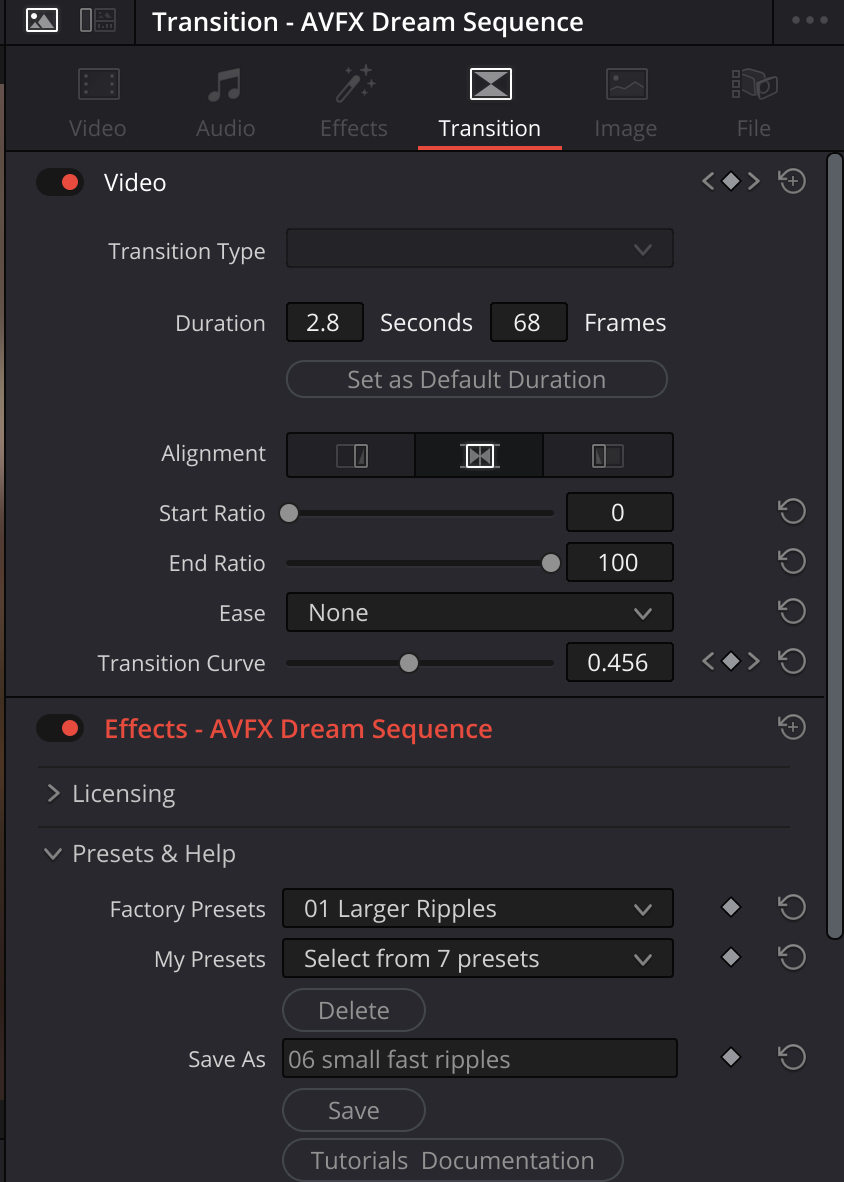
Just grab the effect from the effects browser (under Effects->Open FX->Transitions in the Academy VFX Transitions category) and apply it to a cut on your timeline. This will load the default transition automatically, and that might be fine - but try the other presets: In the inspector, select "transition". Scroll down and open the "Presets and Help" section, and try out the factory presets. (See image below)
Here's a manual quick start:
- Place the transition between two clips
- Scrub to the middle of the transition to see the effect at full strength
- Open the inspector, and select "Transition" to see the parameters. (See image below)
- Adjust Refraction Strength - start around 300-500 for a nice dreamy look
- Set Ripple Size - 0.5 is a good starting point
- Tweak Blur Strength if you want more or less softness at the center of the transition's duration.
 The effect automatically animates based on the transition duration - no keyframing required. At the start and end of the transition, there's no effect. At the midpoint, it's at full intensity.
Parameters
Dream Sequence Group
The main controls you'll use most often.
| Parameter | Default | Range | Description |
|---|---|---|---|
| Refraction Strength | 500.0 | 0.0 - 2000.0 | How much the image warps |
| Ripple Size | 0.5 | 0.0 - 1.0 | Size of ripple features |
| Ripple Speed | 5.0 | 0.0 - 20.0 | How fast ripples animate |
| Blur Strength | 5.0 | 0.0 - 20.0 | Amount of blur at peak |
Refraction Strength
This is your main "intensity" control. It determines how much the image warps through the ripple pattern:
- 0-200: Subtle, gentle warping - barely noticeable
- 200-500: Nice dreamy distortion - the sweet spot for most uses
- 500-1000: Strong, dramatic effect
- 1000+: Extreme, almost abstract
The refraction automatically scales with ripple size, so larger ripples produce proportionally larger distortion. This keeps things looking natural.
Ripple Size
Controls how big the ripple features are:
- 0.0-0.3: Fine, detailed ripples (water-like)
- 0.3-0.6: Medium ripples (glass-like)
- 0.6-1.0: Large, sweeping ripples (heat haze-like)
Ripple Speed
How fast the ripples undulate:
- 0: Static pattern, no animation, but the refraction and blur still ramp up and down across the transition time.
- 1-5: Slow, dreamy movement
- 5-10: Noticeable flow
- 10+: Fast, energetic
Blur Strength
Gaussian blur, that goes from clear to blurry back to clear across the transition time.
- 0: No blur at all
- 2-5: Subtle softening
- 5-10: Noticeable dreamy blur
- 10-20: Strong, very soft look - might even overpower the rippling.
Advanced Group
Fine-tuning controls. You might not need these often, but they're here when you want more control.
| Parameter | Default | Range | Description |
|---|---|---|---|
| Dissolve Delay | 0.25 | 0.0 - 0.45 | Delays the crossfade, so the ripple and blur happen first. |
| Ripple Scale X | 3.0 | 0.1 - 8.0 | Horizontal stretch |
| Ripple Scale Y | 1.0 | 0.1 - 8.0 | Vertical stretch |
| Ripple Offset X | 0.0 | -100 to 100 | Shifts the ripple pattern horizontally - use this to make each instance different by giving it a unique starting point. |
| Ripple Offset Y | 0.0 | -100 to 100 | Shifts the ripple pattern vertically - use this to make each instance different by giving it a unique starting point. |
| Ripple Octaves | 3 | 1 - 8 | Detail layers in the noise |
| Effect Curve | 2.0 | 0.5 - 5.0 | Shape of the intensity ramp |
Dissolve Delay
This controls when the actual crossfade between clips happens:
- 0.0: Crossfade spans the entire transition
- 0.25: (Default) Crossfade happens in the middle 50%
- 0.45: Very brief crossfade, mostly just distortion and blur
Higher values mean you see more of the rippling and blurring before the scene actually changes. It's a stylistic choice. Adding the delay makes the dissolve more invisible - which is usually what you'd want.
Ripple Scale X / Y
Shape the ripple pattern:
- Both at 1.0: Circular, uniform ripples
- X > Y: Horizontally stretched (the default 3:1 ratio feels organic)
- Y > X: Vertically stretched (rain-like)
Ripple Offset X / Y
Shift the entire noise pattern. This is key for creating variety if you use this effect repeatedly in the same sequence
- Different offset values = different ripple patterns
- Great when using the effect multiple times in a project
- Just use a random offset for each instance of the transition, to insure that no two are exactly alike.
Ripple Octaves
Number of ripple layers combined: You probably don't need to change this from the defaults.
- 1-2: Smooth, simple
- 3-4: Natural, organic (recommended)
- 5+: Very detailed, but more GPU-intensive
Effect Curve
Controls the shape of the intensity ramp:
- 1.0-1.5: Gradual, spread across the whole transition
- 2.0: (Default) Smooth bell curve
- 3.0-5.0: Sharp peak, concentrated at the midpoint
Higher values make the effect "pulse" more dramatically at the center.
Tips & Tricks
Classic Flashback Look
- Refraction Strength: 300-500
- Blur Strength: 8-12
- Dissolve Delay: 0.3 (late dissolve)
- Ripple Speed: 3-5 (moderate)
Subtle Dream Transition
For when you want something gentle:
- Refraction Strength: 100-200
- Blur Strength: 2-4
- Ripple Size: 0.6-0.8 (larger = smoother)
- Effect Curve: 3.0 (concentrated at midpoint)
Troubleshooting
I don't see any effect
- Make sure you're scrubbing to the middle of the transition - the effect is zero at the start and end
- Increase Refraction Strength
- Check that there's adequate tails/heads on your outgoing and incoming clips.
The transition feels too abrupt
- Make the effect longer - the very beginning and end have very little visual effect.
- Reduce Effect Curve (try 1.5-2.0)
- Reduce Dissolve Delay (try 0.1-0.2)
- Lower Refraction Strength
Performance is slow
- Reduce Blur Strength (large blurs are expensive)
- Make sure GPU acceleration is enabled in Resolve
Technical Notes
- This is a transition-only effect (appears in Transitions panel)
- Edge handling uses mirror mode to avoid hard edges at extreme refraction