Handheld Camera
Apply organic handheld camera motion with accurate motion blur using data from real handheld cameras.
Choose from 21 different handheld presets, each with a different "character" recorded from real camera movements - from subtle interview setups to intense action sequences.
Add an intimate feel to POV shots, or "grit" to moving shots to add interest to motion that is too bland.
Overview
Handheld Camera brings authentic handheld camera movement to static shots, or "too smooth" footage:
- 21 Motion Datasets - Real captured camera movements
- Motion Blur - Physically accurate blur based on shutter angle
- Full Control - Independent rotation, translation, and scale adjustment
- Frequency Filtering - Separate high and low frequency motions - so you can easily get smoother or shakier character to your motion.
- Adaptive Sampling - Quality automatically scales with motion intensity
Motion Data Credits: Camera motion datasets captured by Jan Klier, Maury Rosenfeld, and Ian Hubert.
Quick Start
The best way to get started is to use the presets to get familiar with the range of effects, then delve into the individual settings.
Easiest: Use the Presets!
Select the effect from the ofx list, and drag it onto a corrector node (color page) or onto a clip (editor page).
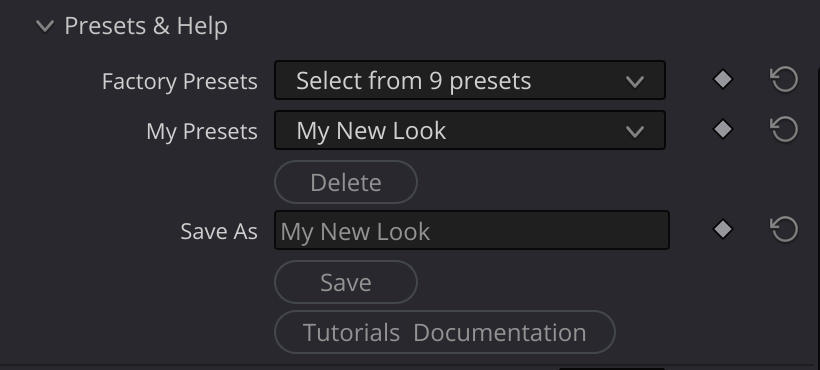
In the presets group, there are two dropdowns: "Factory Presets" and "My Presets". Try out the various factory presets to quickly get a look you like.
Later, when you develop your own looks, you can save your own presets; Give your look a name in the "save as" field, and click "save". Then, your own presets will be available in the "My Presets" drop down.
- Apply the effect to your clip
- Choose a Shake Type from the dropdown
- Adjust Shake Amount to control intensity
- Set Image Scale slightly above 1.0 to avoid black edges
- Enable Motion Blur for realistic results
Inputs
| Input | Required | Description |
|---|---|---|
| Source | Yes | The image to apply camera shake to |
Mocap Datasets
The effect includes 21 motion datasets, each with different character and duration (frame count shown in parentheses):
Interview & Documentary Style
| Preset | Frames | Description |
|---|---|---|
| 01 AK Interview Medium | 1279 | Medium shot interview, subtle natural movement |
| 02 AK Interview Far | 237 | Wide shot interview, minimal movement |
| 17 IH The Closeup | 439 | Close-up shot, intimate feel |
| 18 IH The Interview | 439 | Standard interview setup |
Handheld Walking
| Preset | Frames | Description |
|---|---|---|
| 08 MR Walk | 358 | Walking with camera, natural bounce |
| 09 MR Walk Smoothed | 358 | Same as Walk, with smoothing applied |
| 10 MR Walk Smoothed More | 358 | Extra smoothed walking motion |
| 21 IH Walk To The Store | 123 | Casual walking motion |
Mobile/Action
| Preset | Frames | Description |
|---|---|---|
| 03 MR iPhone Shaky | 299 | Phone-quality shakiness |
| 04 MR Jumpy | 305 | Nervous, jumpy movement |
| 07 MR Nervous | 559 | Anxious, jittery camera work |
| 12 IH Bike On Gravel | 127 | Cycling on rough terrain |
| 13 IH Handycam Run | 65 | Running with camera |
Subtle/Observational
| Preset | Frames | Description |
|---|---|---|
| 05 MR Just Looking | 271 | Observer casually looking around |
| 06 MR Just Looking Smoothed | 271 | Smoothed version |
| 08 MR Slightly Buzzed | 337 | Subtle unsteadiness |
| 14 IH Investigate | 372 | Careful, searching movement |
Vehicle/Special
| Preset | Frames | Description |
|---|---|---|
| 15 IH Out Car Window | 161 | Shooting from moving vehicle |
| 16 IH Spaceship Shake | 144 | Sci-fi turbulence effect |
| 19 IH The Wedding | 162 | Wedding videographer style |
| 20 IH The Zeek | 401 | Very Subtle - You're gonna have to ask Ian Hubert who/what "The Zeek" is/means. Let me know if you find out! |
Parameters
Main Settings
Core controls for the Handheld Camera effect.
| Parameter | Type | Default | Range | Description |
|---|---|---|---|---|
| Shake Type | choice | 05 MR Just Looking | - | Select from 21 motion presets |
| Speed | float | 1.0 | 0.01 - 10.0 | Playback speed of shake pattern |
| Shake Amount | float | 1.0 | -10.0 to 10.0 | Overall intensity multiplier |
| Image Scale | float | 1.0 | 0.1 - 10.0 | Scale of source image (increase to avoid edge reveal) |
Speed
Controls how fast the shake pattern plays:
- 0.5: Half speed, slower, floatier movement
- 1.0: Original recorded speed
- 2.0: Double speed, more frantic
Shake Amount
Master intensity control:
- 0.0: No shake (useful for A/B comparison)
- 0.5: Half intensity, subtle
- 1.0: Original recorded intensity
- 2.0+: Exaggerated shake
- Negative: Inverts the motion
Motion Blur
Simulate realistic motion blur based on camera movement.
| Parameter | Type | Default | Range | Description |
|---|---|---|---|---|
| Motion Blur | bool | true | - | Enable motion blur calculation |
| Shutter Factor | float | 0.5 | 0.0 - 10.0 | Shutter angle (0.5 = 180°, 1.0 = 360°) |
| Sample Multiplier | float | 1.0 | 0.1 - 10.0 | Quality multiplier for blur samples. You'll probably never need to change this. |
Shutter Factor
Maps to traditional shutter angle:
- 0.0: No motion blur (infinite shutter speed)
- 0.5: 180° shutter (film standard)
- 1.0: 360° shutter (full frame exposure)
- 2.0+: Exaggerated blur, dreamy effect
Effect Scale
Independent control over different motion components. These Multiply the values - to increase or decrease the range of motion.
| Parameter | Type | Default | Range | Description |
|---|---|---|---|---|
| Rotation Factor | float | 1.0 | -100 to 100 | Multiplier for rotation component |
| Translation Factor | float | 1.0 | -100 to 100 | Multiplier for position component |
| Translation Scale X | float | 1.0 | -10 to 10 | X-axis translation scale |
| Translation Scale Y | float | 1.0 | -10 to 10 | Y-axis translation scale |
| Scale Factor | float | 1.0 | -10 to 10 | Multiplier for zoom/scale component |
Use these to customize the feel:
- Set Rotation Scale to 0 (or a low number): When you want the camera to feel like it's on a tripod, with an unlocked head.
- Zet Zoom to 0 (or a low number): When you don't want any zooming.
Effect Offset
Add static offsets to the motion. For instance, when you'd like to add a small amount of tilt that remains constant, or to move the whole scene left or right, up or down.
| Parameter | Type | Default | Range | Description |
|---|---|---|---|---|
| Rotation Offset | float | 0.0 | -360 to 360 | Static rotation offset in degrees |
| Translation Offset X | float | 0.0 | -2.0 to 2.0 | X position offset (UV space) |
| Translation Offset Y | float | 0.0 | -2.0 to 2.0 | Y position offset (UV space) |
| Frame Offset | float | 0.0 | -1000 to 1000 | Offset into the shake data |
Frame Offset
Start at a different point in the motion data:
- Avoid repetition when using the same preset multiple times
- Avoid a specific "bump" in the effect by offsetting past (or before) it.
Advanced Filtering
Separate high-frequency jitter from low-frequency drift.
This is a powerful feature, that lets you quickly change the character of the sampled motion.
The easiest way is to use the "Balance" knob - it's kinda like the "tone control" on an old school radio. Move it left, and it makes the motion smoother, by cutting out the jittery component. Move it right, and it cuts out the "swimmy" motion, by removing the lower frequency components.
You can still dial in the highs and lows manually, with the individual high and low frequency knobs.
That last slider, the filter size, is what defines the boundary between high and low. In practice, you'll rarely need this control. The useful range is from 2 to 5 or 6, and 4 is the sweet spot for most cases. As you lower the number, the highs include less content, and it is higher frequency, while the lows include more content, and include some of the highs.
| Parameter | Type | Default | Range | Description |
|---|---|---|---|---|
| Enable Filtering | bool | false | - | Enable frequency filtering |
| Frequency Balance | float | 0.5 | 0.0 - 1.0 | 0 = low frequency only, 1 = high frequency only |
| High Freq Power | float | 1.0 | 0.0 - 10.0 | Multiplier for high frequency (jitter) |
| Low Freq Power | float | 1.0 | 0.0 - 10.0 | Multiplier for low frequency (drift) |
| Filter Size | int | 4 | 1 - 10 | Cutoff frequency (smaller = isolates higher frequencies) |
Miscelaneous
Show Overshoot/Overshoot Color/Overshoot Tolerance
Because we are moving the frame around, you'll have to enlarge the frame a little, to prevent "shooting off the frame". Enabling Show Overshoot is a diagnostic tool, that can help you tune the effect, so you minimize the amount that you have to blow up the image to get the best results.
When Show Overshoot is enabled, the image will turn a color (the color you select in the "Overshoot Color" parameter) when you are sampling outside of the image. It will also turn the specific pixels that are at issue the complimentary color, for easy identification of where the problem lies.
You can increase the image scale, or animate the offsets to minimize this issue - but often, setting the edge treatment to "mirror" will make the issue unnoticeable.
For your convenience, there's also an overshoot tolerance, in percent. If you set it to 0.5%, then an overshoot of 0.5% will not trigger the overshoot indicator.
Edge Treatment
This is how the edges are rendered, if you sample off of the image. The default is mirrored, but you can also repeat the edge pixels, or just render black outside of the original image.
Tips & Tricks
Handling "Overshoot"
The most common issue is when the motion is large enough to "shoot off the edge of the image" as the camera moves:
- Increase Image Scale to 1.05-1.15
- Or reduce Shake Amount to keep motion within frame
- Or animate the offsets to keyframe for a few problem frames.
Use the "Show Overshoot" diagnostic tool to help identify problems.
Matching Footage Feel
To match existing handheld footage:
- Choose a preset similar in energy to your target
- Adjust Speed to match timing
- Use Effect Scale to emphasize certain motion types
- Enable Filtering to fine-tune jitter vs. drift